
Venepuncture and Blood Cultures OSCE Guide
Thanks to our friends at the Leicester University Medical School Student Hub for putting this together — don't forget to like and subscribe to the Leicester Medical School channel if you found this useful!
During any practical procedure in an OSCE it is important to understand the reasoning behind each step, not simply to perform the actions in the correct order. This article explains how to perform venepuncture (taking a venous blood sample) and how to collect blood cultures, showing you what each step achieves and why it matters for patient safety and accurate results.
Venepuncture is one of the most frequently performed procedures in the NHS, and blood cultures are a closely related skill that uses the same access but with a stricter aseptic approach. Mastering both — and being able to justify every action — is a core expectation for medical students and junior doctors.
Contents
- Introduction
- Gather and Prepare Equipment
- Site Selection and Applying the Tourniquet
- Cleaning the Skin
- Performing the Venepuncture
- Order of Draw and Blood Bottles
- Labelling and Documentation
- Blood Cultures: Aseptic Technique
- Blood Cultures: Filling the Bottles
- Complications and Managing Difficulty
- Completing the Procedure
- Quiz
Introduction
Wash your hands thoroughly and put on a disposable apron. Hand hygiene before patient contact is the single most effective step in preventing healthcare-associated infection, and it is doubly important here because you are about to breach the skin barrier.
Introduce yourself to the patient and state your grade, e.g. medical student, foundation doctor or registrar.
Confirm the patient's details using 3 points of identification: full name, date of birth and NHS/hospital number. Cross-check these against the request form and the patient's wristband. Correct identification is the foundation of safe sample-taking — a mislabelled sample can lead to a serious transfusion error or the wrong patient being treated.
Explain the procedure and gain consent. Tell the patient they will feel a sharp scratch, roughly how long it will take, and why the blood is being taken.
Ask about relevant history before you start. The key questions are:
- Any needle phobia or history of fainting with blood tests — if so, perform the procedure with the patient lying down.
- A preferred arm, and whether previous samples have been easy or difficult to obtain.
- Any lymphoedema or previous mastectomy with axillary clearance — avoid that arm, as impaired lymphatic drainage increases the risk of infection and swelling.
- An arteriovenous fistula (for dialysis) — never use a fistula arm, as venepuncture risks damaging or infecting it.
- Any anticoagulant or antiplatelet medication or known bleeding tendency, as you will need to apply pressure for longer afterwards.
- Any allergies, particularly to latex, chlorhexidine or plasters.
Position the patient comfortably, ideally seated or lying with the arm supported and extended, and ask about any pain before you touch them.
Gather and Prepare Equipment
Collecting all your equipment beforehand keeps the procedure smooth and means you never have to leave a patient mid-procedure or break your technique to fetch a missing item.
You will typically need:
- A clean procedure tray, cleaned with a detergent wipe and allowed to dry
- Non-sterile gloves (and an apron)
- A tourniquet
- 2% chlorhexidine in 70% isopropyl alcohol skin-cleansing wipes (e.g. ChloraPrep)
- A needle and vacuum holder (a closed Vacutainer-style system) or a winged "butterfly" device for smaller or more fragile veins
- The appropriate blood collection bottles for the tests requested
- Gauze and a plaster (check for plaster allergy)
- A sharps bin, taken to the bedside
- Sample labels and the completed request form
Always take the sharps bin to the point of use. Carrying an exposed needle across a room to dispose of it is a leading cause of needlestick injury.
Check the expiry dates on the blood bottles and skin-cleansing wipes, and inspect the packaging for damage before opening.
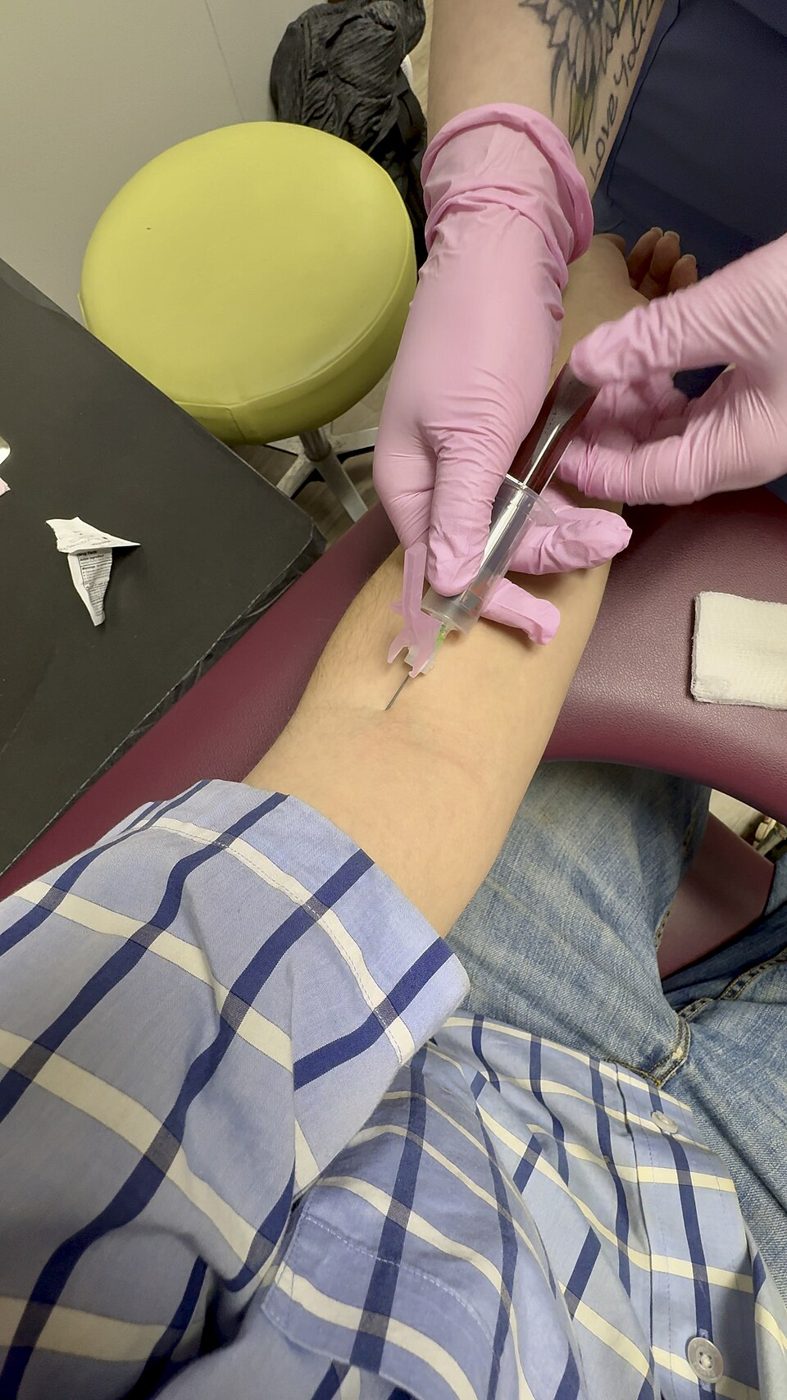
Image - Venepuncture being performed at the antecubital fossa, the most common site for taking blood
Creative commons source by Harrison Keely [CC BY 4.0 (https://creativecommons.org/licenses/by/4.0)]
Site Selection and Applying the Tourniquet
The most common site for venepuncture is the antecubital fossa (the front of the elbow), because the superficial veins here are usually large, well-anchored and easy to feel. The median cubital vein is often the first choice as it is typically prominent, relatively fixed in position, and overlies the bicipital aponeurosis, which gives some protection to the underlying brachial artery and median nerve. The cephalic and basilic veins are alternatives, although the basilic vein is used more cautiously because the brachial artery and median nerve lie close by on the medial side.
Apply the tourniquet roughly 4–5 finger-widths (about 7–10 cm) above the intended site. The tourniquet works by being tight enough to occlude venous return while still allowing arterial inflow, so blood pools in the superficial veins and makes them easier to see and feel. You should still be able to palpate a radial pulse — if you cannot, the tourniquet is too tight and is restricting arterial flow.
Ask the patient to clench and unclench their fist to help engorge the veins. A good vein feels soft, bouncy and refills when pressed; you are selecting by feel as much as by sight. Avoid veins that feel hard or cord-like (thrombosed), areas that are bruised, infected or inflamed, and sites near a fistula or on the side of a previous mastectomy.
Do not leave the tourniquet on for more than about one minute before sampling. Prolonged application causes haemoconcentration and stasis, which can falsely raise results such as potassium, calcium and lactate and cause sample haemolysis.
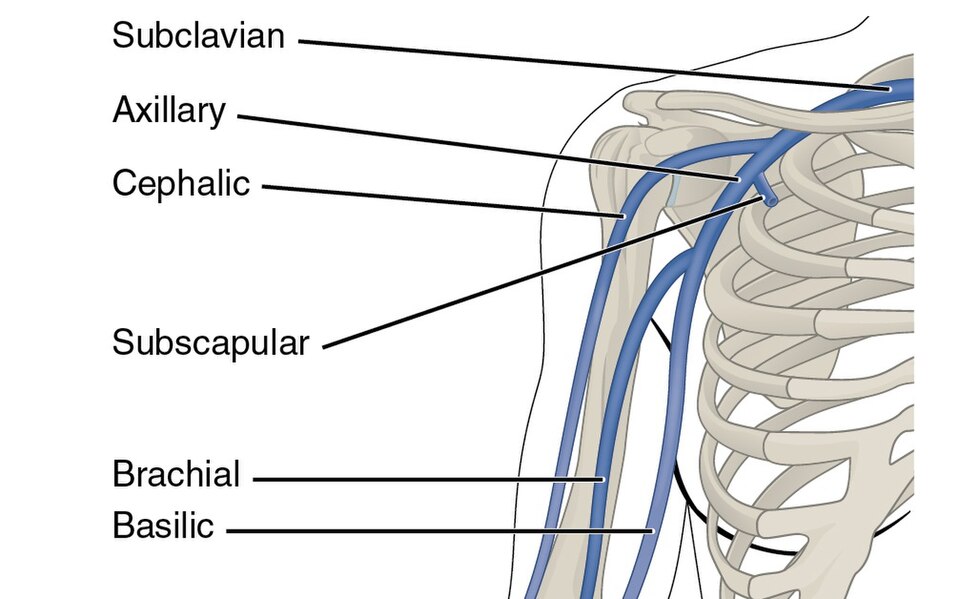
Image - The superficial veins of the upper limb. The median cubital vein in the antecubital fossa is usually the first choice for venepuncture
Creative commons source by OpenStax College [CC BY 3.0 (https://creativecommons.org/licenses/by/3.0)]
Cleaning the Skin
Once you have chosen your vein, clean the skin with a 2% chlorhexidine in 70% isopropyl alcohol wipe. Work outwards from the centre of the chosen site in a single sweep, clean for 30 seconds, then allow the skin to dry completely (do not fan, wipe or blow on it). Skin disinfection reduces the patient's own skin flora, which is the commonest source of contamination, and letting it dry is essential because chlorhexidine and alcohol only kill organisms while wet and acting — sampling too soon also stings and can haemolyse the sample.
For routine venepuncture, once the skin is clean you should not re-palpate the vein over the cleaned area. If you really need to feel the vein again, you must re-clean the skin afterwards.
Performing the Venepuncture
Put on your gloves. Warn the patient of a sharp scratch. Anchor the vein by gently pulling the skin taut distal to the puncture site with your non-dominant thumb — this stops the vein rolling away as the needle approaches.
Insert the needle bevel up at an angle of 30 degrees or less to the skin, in line with the vein. A shallow angle keeps you within the lumen rather than passing straight through the back wall of the vein. As the tip enters the vein you will usually feel a sudden give or loss of resistance and see a flashback of blood; advance the needle a further 1–2 mm to make sure the tip is securely within the lumen before attaching bottles.
Keeping the needle still, attach each blood bottle in turn and allow the vacuum to fill it to the marked line. Underfilling matters: tubes containing additives (such as the citrate in coagulation tubes) rely on a fixed blood-to-additive ratio, and an underfilled coagulation sample will give a falsely prolonged result.
Once the final bottle is filled, release the tourniquet first, then remove the needle. Releasing the tourniquet before withdrawing the needle reduces the venous pressure and the size of any bruise. Apply gauze with firm pressure over the site as you withdraw — but do not press until the needle is fully out, as pressing on the needle is painful and can tear the vein.
Activate the needle's safety guard and dispose of the whole sharp immediately into the sharps bin at the bedside. Ask the patient to keep pressure on the gauze for a minute or two, then apply a plaster once bleeding has stopped.
Order of Draw and Blood Bottles
When you are filling several bottles from a single venepuncture, the order of draw matters. Filling tubes in the wrong order can carry additive from one tube back into the next and produce inaccurate results.
The general principles to remember are:
- Blood cultures first (if being taken), to minimise the chance of contamination.
- Coagulation samples (citrate, often a blue-topped tube) are taken before tubes containing other additives, so that contamination does not interfere with clotting tests.
- Biochemistry before haematology — specifically, serum/biochemistry tubes are taken before EDTA (the additive in the full blood count tube). EDTA contains potassium and binds calcium, so even tiny carry-over into a biochemistry sample can cause spuriously high potassium and low calcium readings.
Bottle colours vary between manufacturers and NHS trusts, so always check your local guidance rather than relying on colour alone. As a rough guide in many UK labs, the blue top holds citrate for coagulation, the gold/yellow top is the serum tube for biochemistry (U&Es, LFTs, CRP, bone profile), the purple top contains EDTA for the full blood count, and the pink top is used for group and save. The important exam point is being able to explain why the order matters: to protect each test from cross-contamination by the additive in another tube.
After filling, gently invert (do not shake) the tubes that contain additives so the blood and additive mix properly — vigorous shaking causes haemolysis, which can render samples unusable and falsely elevate potassium and other intracellular markers.
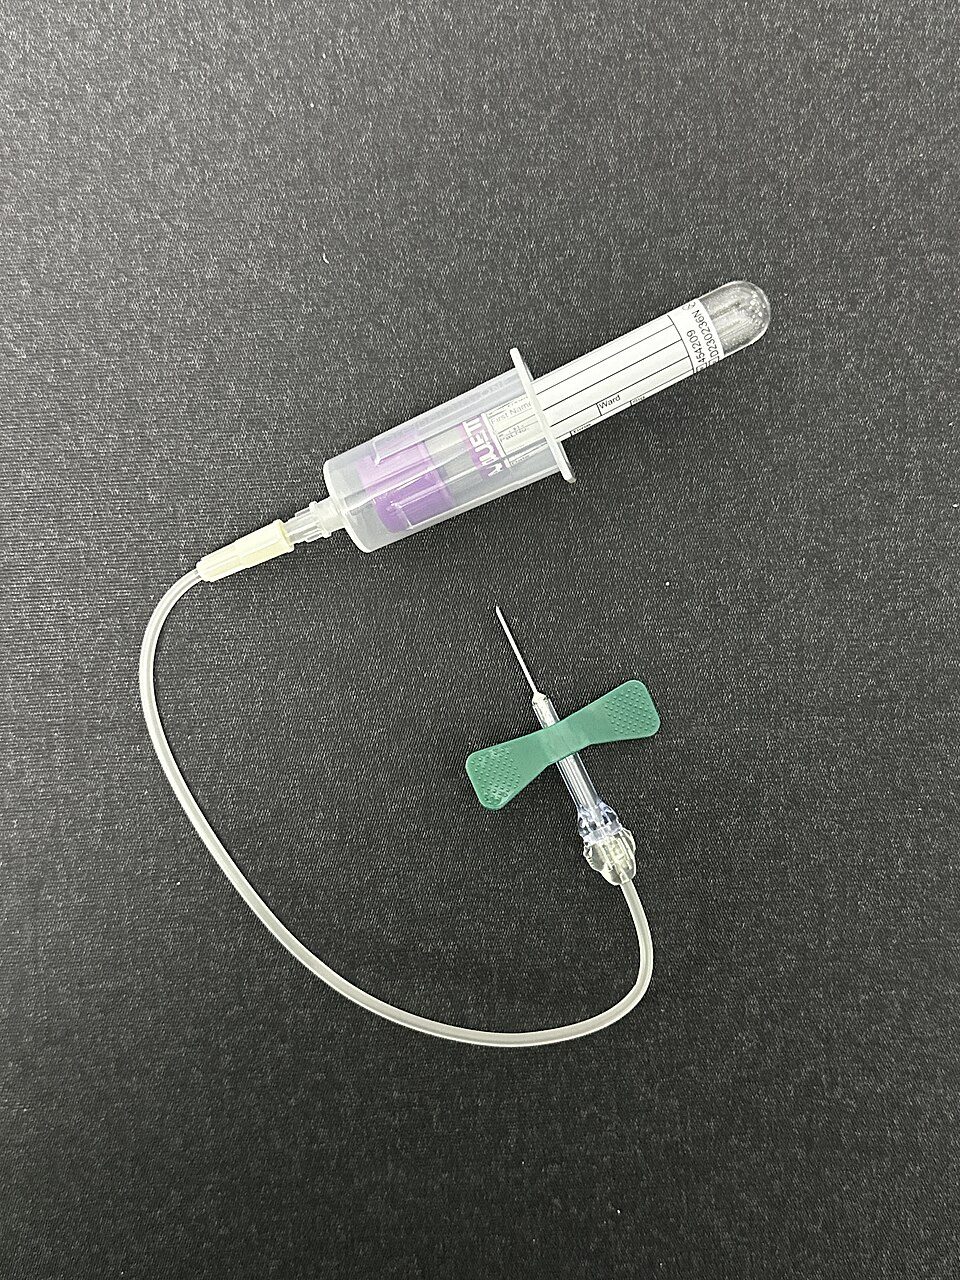
Image - A closed vacuum (Vacutainer-style) collection system. The vacuum tube draws a fixed volume of blood, which is why filling to the line matters
Creative commons source by Whispyhistory [CC BY 3.0 US (https://creativecommons.org/licenses/by/3.0/us)]
Labelling and Documentation
Label the bottles at the bedside, immediately, before you leave the patient. Never pre-label bottles before taking the sample and never label away from the patient — both practices risk a sample being attributed to the wrong person, which is a recognised cause of serious patient harm.
Each label must carry the patient's full name, date of birth, NHS/hospital number, and the date and time of collection, plus your identity as the person who took the sample. Samples for group and save / crossmatch have particularly strict, often handwritten, labelling requirements because a labelling error here can cause a fatal transfusion reaction.
Place the labelled samples in the appropriate bags with the completed request form and arrange prompt transport to the laboratory, as some samples (such as blood cultures and certain biochemistry tests) deteriorate if delayed.
Blood Cultures: Aseptic Technique
Blood cultures are taken when bacteraemia or sepsis is suspected, to identify the causative organism and guide antibiotic therapy. Because the sample is incubated to grow any organisms present, even a few contaminating skin bacteria can grow and produce a false-positive result — potentially leading to unnecessary antibiotics, extra investigations and longer hospital stays. For this reason blood cultures demand a stricter approach than routine venepuncture, using an Aseptic Non-Touch Technique (ANTT).
Key principles of ANTT for blood cultures:
- Ideally take blood cultures before antibiotics are given, so the organism is not suppressed.
- Perform meticulous hand hygiene and prepare your equipment on a clean tray, opening packs without touching the parts that will contact the blood (the key parts).
- Clean the patient's skin with 2% chlorhexidine in 70% isopropyl alcohol and allow it to dry fully. Do not re-touch the cleaned site afterwards — not even with a gloved finger.
- Clean the top of each culture bottle: remove the plastic cap and wipe the rubber septum with a separate cleaning wipe, allowing it to dry before you inoculate. The bottle tops are not sterile on the inside of the cap, so this prevents you pushing surface contaminants into the broth.
If you need to take cultures and routine bloods from the same venepuncture, fill the culture bottles first.
Blood Cultures: Filling the Bottles
A blood culture set usually consists of an aerobic bottle and an anaerobic bottle, which between them allow growth of organisms that do or do not require oxygen.
The order in which you fill them depends on the system:
- If you are using a needle and syringe (where a little air is drawn up with the blood), fill the anaerobic bottle first so that the trapped air is not introduced into it, then the aerobic bottle.
- If you are using a winged collection set into a vacuum holder (where air in the tubing would enter the first bottle), fill the aerobic bottle first so that any air goes into the aerobic bottle rather than the anaerobic one.
Each bottle should be filled with around 8–10 ml of blood (check the fill line on the bottle). Adequate volume directly improves the chance of detecting an organism, because the number of bacteria in the blood may be very low; underfilled bottles substantially reduce the sensitivity of the test.
Do not exceed the recommended volume either, as overfilling alters the blood-to-broth ratio and can also affect detection. After filling, label the bottles at the bedside and send them to the laboratory promptly, ideally noting the collection time and site so that a true infection can be distinguished from contamination.
Where two sets are requested (for example to help interpret possible contaminants or to assess for endocarditis), they should be taken from separate venepuncture sites, each with a fresh aseptic preparation.
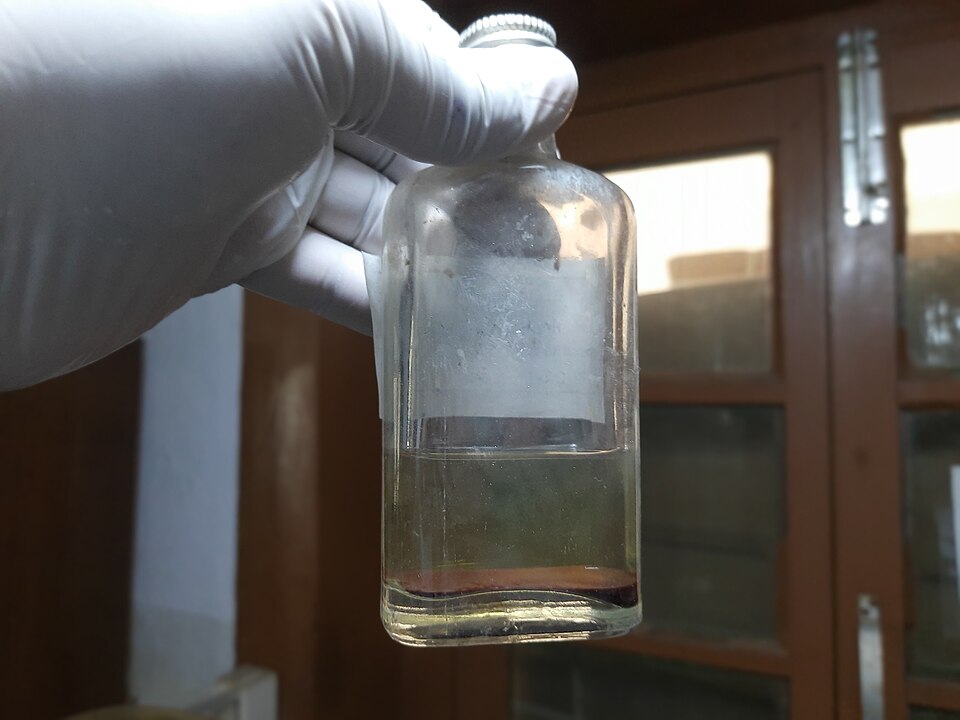
Image - A blood culture bottle. The broth is incubated to grow any organisms present, which is why strict aseptic technique is essential to avoid false positives
Creative commons source by Ajay Kumar Chaurasiya [CC BY-SA 4.0 (https://creativecommons.org/licenses/by-sa/4.0)]
Complications and Managing Difficulty
Even with good technique, venepuncture can be difficult or have complications. Knowing how to recognise and respond to these is an important part of the skill.
If the veins are hard to find, a few simple measures often help: make sure the patient is warm and well hydrated, lower the arm below the level of the heart for a minute to encourage venous filling, apply a warm compress to the site, and gently tap over the vein (firm tapping can cause the vein to constrict). For fragile or small veins, a winged "butterfly" device with a small syringe generates gentler suction and is less likely to collapse the vein.
Limit yourself to no more than two or three attempts. If you are still unsuccessful, stop and ask a more experienced colleague rather than causing the patient repeated discomfort and bruising.
- No flashback / missed vein: withdraw slightly and gently redirect; if unsuccessful, remove the needle, apply pressure, and try a new site with fresh equipment. Do not "dig around", which is painful and damages tissue.
- Haematoma (bruising): caused by blood leaking from the vein, often from leaving the tourniquet on after needle removal or inadequate pressure afterwards. Apply firm pressure to manage it.
- Vasovagal episode (fainting): if the patient feels faint, stop, lie them flat and raise their legs.
- Arterial puncture: suspected if the blood is bright red and pulsatile or the patient reports severe pain — remove the needle and apply firm pressure for at least 5 minutes.
- Nerve irritation: sharp, shooting or electric-shock pain radiating down the arm suggests the needle is near a nerve — withdraw immediately.
- Needlestick injury (to you): encourage the wound to bleed, wash with soap and running water, cover it, and report and document it following the local occupational health and inoculation-injury policy without delay.
Completing the Procedure
Ensure the puncture site has stopped bleeding and apply a plaster or dressing. Check the patient is comfortable and has no further concerns.
Dispose of all sharps and clinical waste correctly, and clean the tray. Remove your gloves and apron and wash your hands.
Confirm the bottles are correctly labelled and send them, with the request form, promptly to the laboratory.
Thank the patient.
To complete the procedure, you should document in the notes what was done, the site used, who took the sample and the date and time, and any complications. State that you would follow up the results and act on them appropriately — for example, in suspected sepsis, ensuring blood cultures are taken as part of the Sepsis Six alongside timely antibiotics, fluids and other urgent measures.
- 44