
Thanks to our friends at the Leicester University Medical School Student Hub for putting this together — don't forget to like and subscribe to the Leicester Medical School channel if you found this useful!
During any examination in an OSCE it is important to understand the pathology and reasoning behind each of the signs and symptoms elicited, even if the patient being examined is ‘normal’. This article explains how to perform a blood pressure measurement and the key findings you should look for, showing you what each sign means and what conditions it may indicate.
Blood pressure measurement is one of the most frequently performed clinical skills in the NHS, and it is deceptively easy to get wrong. A measurement is only useful if the technique is correct, so understanding why each step matters is just as important as the steps themselves.
General Inspection and Equipment
Before measuring, take a moment for a general inspection of the patient and the bedside. Note whether the patient appears comfortable or distressed, flushed, sweaty or pale, as anxiety, pain and recent exertion all transiently raise blood pressure. Look around the bed for clues such as fluid balance charts, an observation chart, antihypertensive medications or a GTN spray.
Choose the arm carefully. Avoid an arm with an arteriovenous fistula (used for dialysis), lymphoedema following axillary surgery such as a mastectomy, an intravenous cannula or infusion running, or any area of injury or infection. Inflating a cuff over these can cause harm or give an unreliable result.
Gather and check your equipment: a sphygmomanometer (manual aneroid or mercury column, or a validated automated device), an appropriately sized cuff, and a stethoscope if measuring manually.
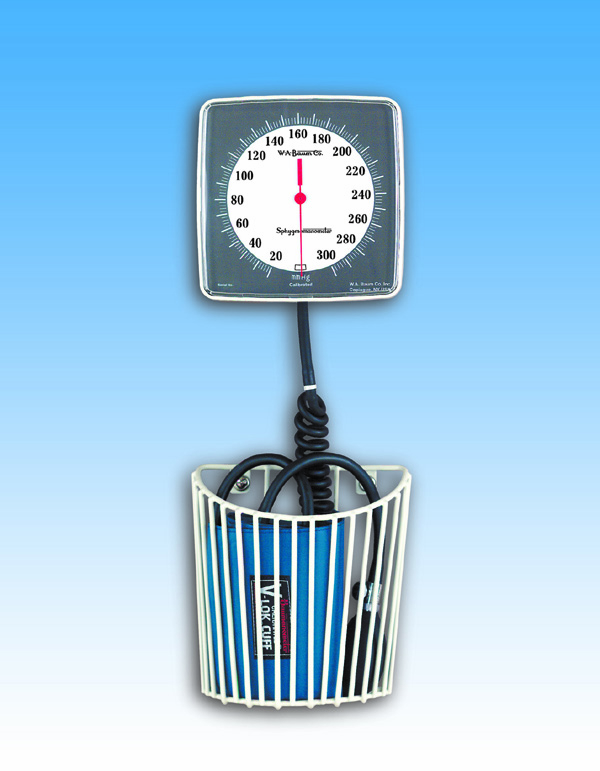
Image - A clinical aneroid sphygmomanometer with its cuff and inflation bulb, used to measure blood pressure manually by auscultation
Creative commons source by Michael V Hayes [CC BY-SA 4.0 (https://creativecommons.org/licenses/by-sa/4.0)]
Cuff size is critical and a common source of error. Match the cuff to the patient’s upper-arm circumference: the inflatable bladder inside the cuff should encircle at least 80% of the arm. A cuff that is too small requires more pressure to compress the artery and will overestimate blood pressure, whereas a cuff that is too large will underestimate it. Keep small, standard and large cuffs available and choose deliberately rather than defaulting to whichever is to hand.
Measuring Systolic and Diastolic Pressure by Auscultation
Place the diaphragm of the stethoscope gently over the brachial artery in the antecubital fossa. Avoid pressing too hard or tucking the stethoscope under the cuff, as this can produce turbulent flow and artefactual sounds.
Re-inflate the cuff to around 20–30 mmHg above the palpated systolic estimate, then slowly deflate it at approximately 2–3 mmHg per second. Deflating too quickly will cause you to overshoot the true pressures and underestimate the reading.
As the cuff deflates you will hear the Korotkoff sounds. These arise because the cuff partially occludes the brachial artery, and as the pressure falls below systolic, blood begins to spurt through the narrowed vessel in turbulent, pulsatile bursts which are audible. The classification is as follows:
- Phase I – the first appearance of clear, repetitive tapping sounds. The pressure at this point is the systolic blood pressure.
- Phase II – softer, sometimes swishing sounds.
- Phase III – crisper and louder sounds as more blood flows through.
- Phase IV – an abrupt muffling of the sounds.
- Phase V – the point at which the sounds disappear completely. This is taken as the diastolic blood pressure.
The sounds disappear at diastole because, once cuff pressure falls below the lowest (diastolic) pressure in the artery, flow becomes continuous and laminar rather than turbulent, and laminar flow is silent. In most adults Phase V is taken as the diastolic value, but in situations where the sounds carry on almost to zero — classically in pregnancy and in children — the muffling at Phase IV is used instead.
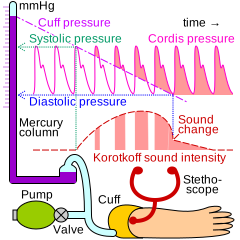
Image - The principle behind manual measurement. The cuff pressure is shown falling over time; turbulent flow produces the Korotkoff sounds, which begin at systolic pressure and disappear at diastolic pressure
Creative commons source by Cmglee [CC BY-SA 4.0 (https://creativecommons.org/licenses/by-sa/4.0)]
Record the result as systolic over diastolic, for example 120/80 mmHg, and note which arm was used and the patient’s position. Continue deflating fully and remove the cuff once finished.
Automated Blood Pressure Measurement
In day-to-day NHS practice, blood pressure is most often measured with a validated automated (oscillometric) device. Rather than detecting Korotkoff sounds, these devices measure the oscillations in cuff pressure produced by the pulsating artery. The point of maximal oscillation corresponds to the mean arterial pressure, and the device uses an algorithm to estimate the systolic and diastolic values from this.
The same principles still apply: the patient should be rested and seated, the cuff size must be correct, and the arm supported at heart level. Automated devices can be unreliable in atrial fibrillation and other irregular rhythms because the algorithm assumes a regular pulse; in these patients a manual measurement is preferred. If an automated reading is unexpectedly high or low, it should always be confirmed manually.
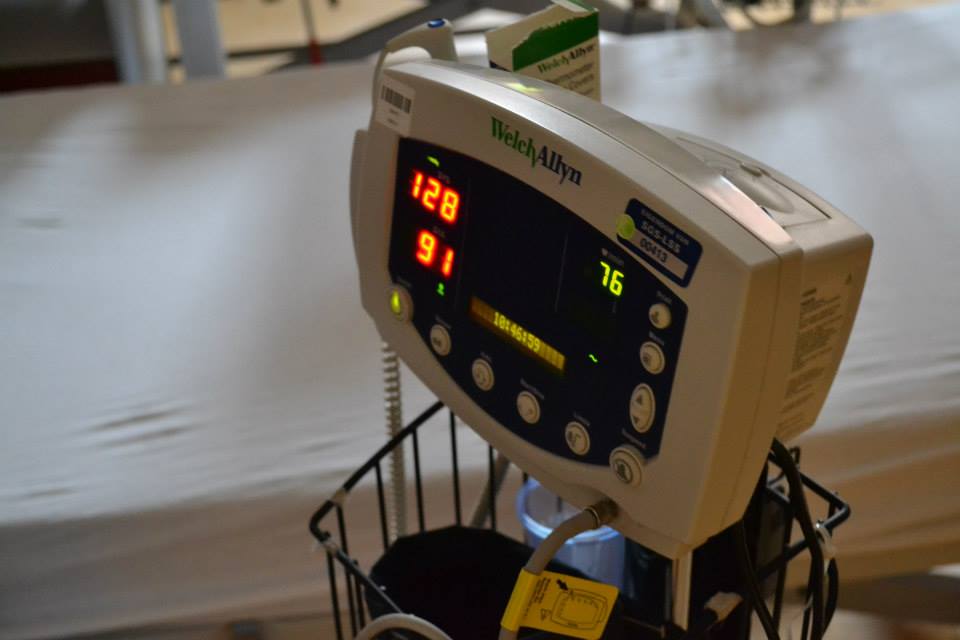
Image - An automated (oscillometric) blood pressure monitor, the type most commonly used on NHS wards and in general practice
Creative commons source by Belovaci [CC BY-SA 4.0 (https://creativecommons.org/licenses/by-sa/4.0)]
Interpreting the Reading
A normal adult blood pressure is generally considered to be around 120/80 mmHg. Using current UK (NICE) thresholds for a clinic reading, hypertension is diagnosed when the blood pressure is persistently 140/90 mmHg or higher (with ambulatory or home monitoring used to confirm the diagnosis). Hypotension is broadly defined as a blood pressure below 90/60 mmHg, though what matters clinically is whether the patient is symptomatic or under-perfused.
Persistent hypertension is a major risk factor for stroke, ischaemic heart disease, heart failure and chronic kidney disease. The vast majority of cases are primary (essential) hypertension with no single identifiable cause, but it is important to remember secondary causes such as renal disease, primary hyperaldosteronism, phaeochromocytoma and coarctation of the aorta. Coarctation is worth bearing in mind in a younger patient, where it characteristically produces hypertension in the arms with relatively low pressures in the legs and a radio-femoral delay.
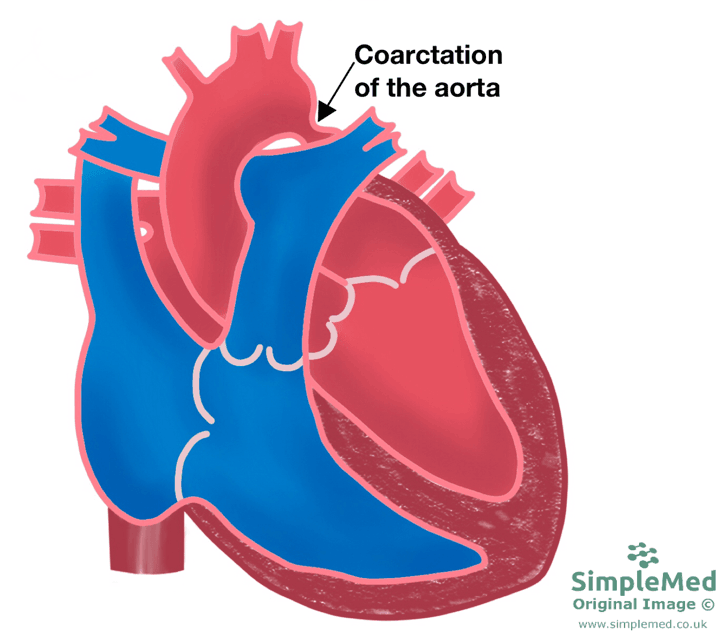
Image - Coarctation of the aorta: narrowing of the aorta beyond the arch raises pressure proximally (the arms) while reducing it distally (the legs), a recognised secondary cause of hypertension in younger patients
SimpleMed original
Hypotension may reflect hypovolaemia, sepsis, cardiac failure, an arrhythmia, or the effect of medication. A single low reading in a well patient is often of little concern, but a low blood pressure in an acutely unwell patient is a red flag for shock and warrants urgent review.
It is also worth considering the pulse pressure, which is the difference between the systolic and diastolic values (normally around 40 mmHg). A wide pulse pressure can be seen in aortic regurgitation and in stiff, calcified arteries in the elderly, whereas a narrow pulse pressure can occur in aortic stenosis, heart failure or significant hypovolaemia.
- 230