
During any examination in an OSCE it is important to understand the pathology and reasoning behind each of the signs and symptoms elicited, even if the patient being examined is ‘normal’. This article explains how to perform a lymphoreticular examination and the key findings you should look for, showing you what each sign means and what conditions it may indicate.
The lymphoreticular examination is usually performed when there is a clinical suspicion of haematological disease, such as lymphoma or leukaemia, or an underlying infection or inflammatory condition. Its purpose is to detect lymphadenopathy (enlarged lymph nodes) and hepatosplenomegaly (enlargement of the liver and spleen), which are the hallmark signs of pathology affecting the lymphoreticular system. The examination therefore combines a systematic survey of the major lymph node groups with a focused examination of the abdomen.
Hands and Arms
Take the patient’s hands and inspect them. Look for pallor of the palmar creases, which is a useful sign of anaemia – the creases lose their normal pink colour when haemoglobin is low.
Examine the nails for koilonychia (spoon-shaped nails), which is associated with chronic iron deficiency anaemia, and for signs of clubbing. Whilst clubbing is more classically a cardiovascular or respiratory sign, it can occasionally accompany chronic systemic disease.
Inspect the skin of the hands and forearms for bruising and petechiae, again reflecting possible thrombocytopenia. Note any excoriations from scratching.
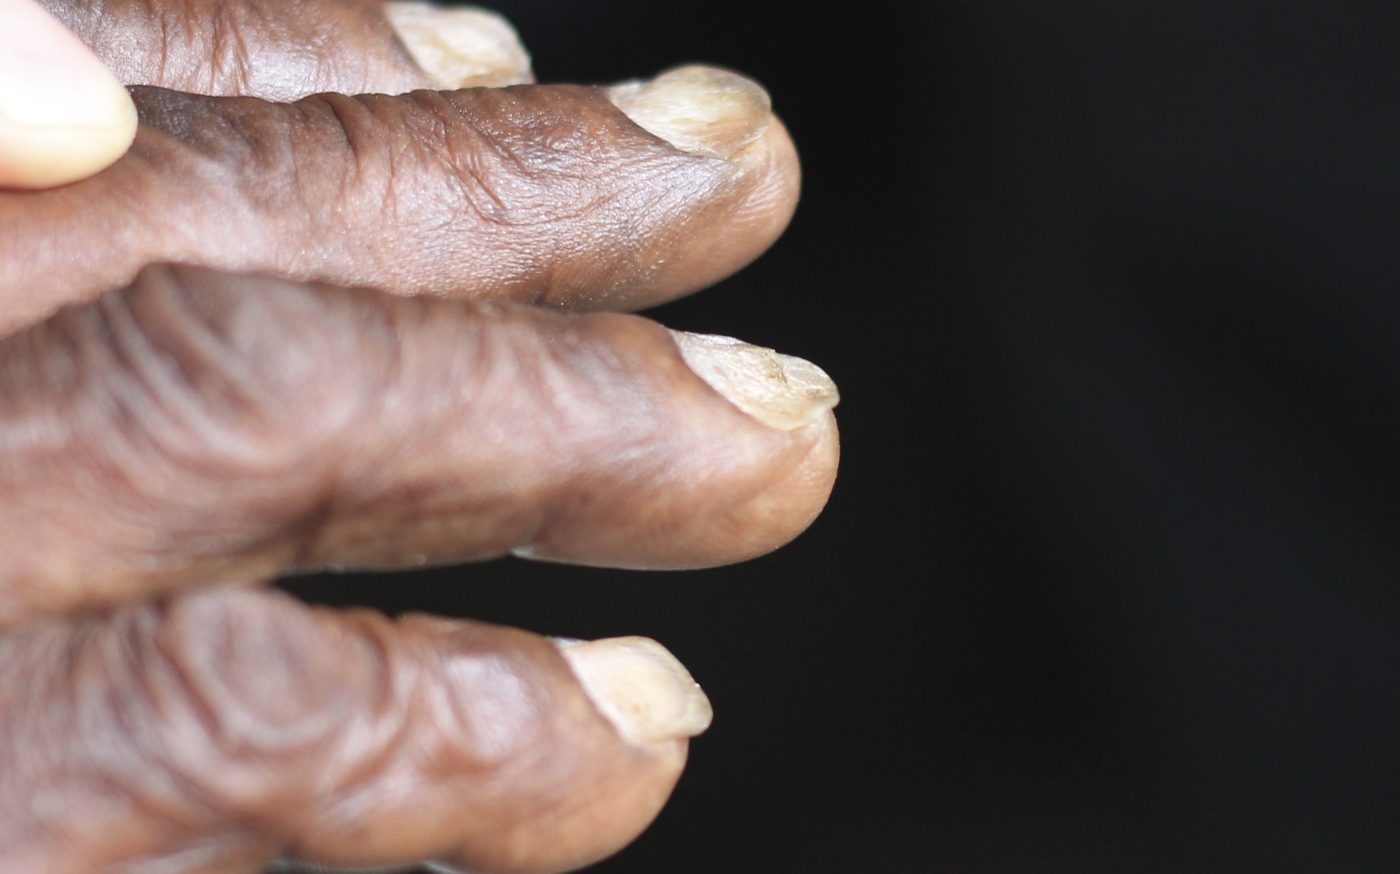
Image - Koilonychia, where the nails become thinned and spoon-shaped. This is a sign of chronic iron deficiency anaemia
SimpleMed original
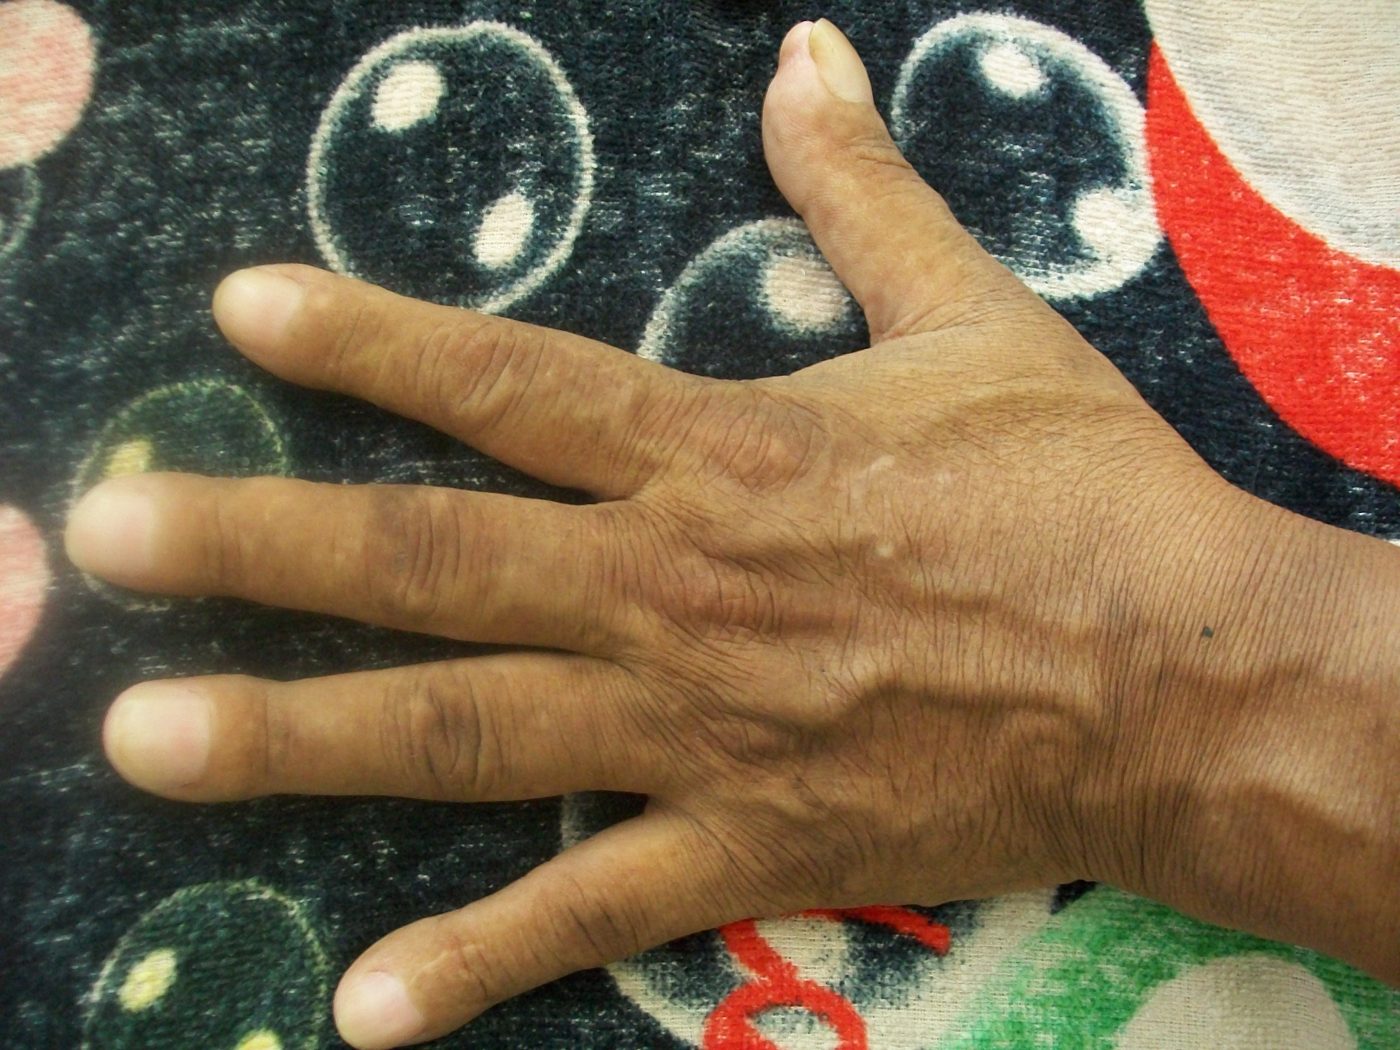
Image - Finger clubbing, where the angle at the nail bed is lost and the fingertips appear bulbous. Clubbing is occasionally seen in lymphoma and chronic disease
Creative commons source by Bobjgalindo [CC BY-SA 4.0 (https://creativecommons.org/licenses/by-sa/4.0)]
Face, Eyes and Mouth
Inspect the face for any obvious swelling. Marked swelling of the face and neck, sometimes with distended veins, may indicate superior vena cava obstruction – an oncological emergency that can be caused by a large mediastinal mass of lymphadenopathy compressing the SVC.
Ask the patient to gently pull down their lower eyelid and inspect the conjunctiva. Conjunctival pallor suggests anaemia. Inspect the sclerae for jaundice, which as above may reflect haemolysis or hepatic involvement.
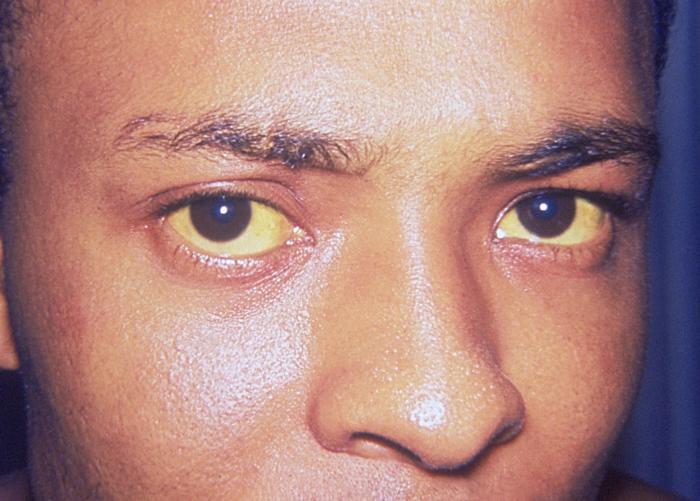
Image - Jaundice of the sclera, where bilirubin gives the white of the eye a yellow tinge. In this context it may point to haemolysis or liver involvement
SimpleMed original
Inspect the mouth. Look for gum hypertrophy, which is a classic feature of acute myeloid leukaemia (particularly the monocytic subtypes) due to infiltration of the gums by leukaemic cells. Look for oral ulceration and signs of infection such as oral candidiasis (white plaques), which are more common in immunocompromised patients. Anaemia may also produce angular stomatitis (cracking at the corners of the mouth) and glossitis (a smooth, sore tongue).
Do not forget to examine Waldeyer’s ring – the ring of lymphoid tissue in the pharynx that includes the tonsils. Inspect the tonsils for asymmetric enlargement, as lymphoma can present here.
Cervical Lymph Nodes
The examination of the lymph nodes is the central component of the lymphoreticular examination. Use the pads of your middle three fingers to gently roll each node group against the underlying tissue, rather than poking with the fingertips. Compare both sides systematically for asymmetry, but examine the anterior cervical chains near the carotid arteries one side at a time to avoid simultaneous carotid compression. For every palpable node assess:
- Site – which node group is involved
- Size – nodes larger than 1 cm are generally considered abnormal
- Consistency – reactive nodes from infection tend to be soft and tender; lymphoma nodes are characteristically rubbery and non-tender; and metastatic carcinoma nodes are typically hard and craggy
- Mobility – whether the node is freely mobile or fixed (tethered) to surrounding tissue, as fixation suggests malignant infiltration
- Tenderness – tender nodes usually indicate acute infection or inflammation
It is best to examine the cervical nodes from behind the seated patient, asking them to relax and slightly flex their neck to loosen the overlying muscles. Palpate each of the cervical node groups in turn, in a logical order so that none are missed:
- Submental – beneath the point of the chin
- Submandibular – below the body of the mandible
- Tonsillar (and parotid) – at the angle of the mandible
- Pre-auricular – in front of the ear
- Post-auricular – behind the ear
- Occipital – at the base of the skull
- Anterior cervical chain – along the front border of the sternocleidomastoid
- Posterior cervical chain – along the back border of the sternocleidomastoid
- Supraclavicular and infraclavicular – in the hollows just above and below the clavicle
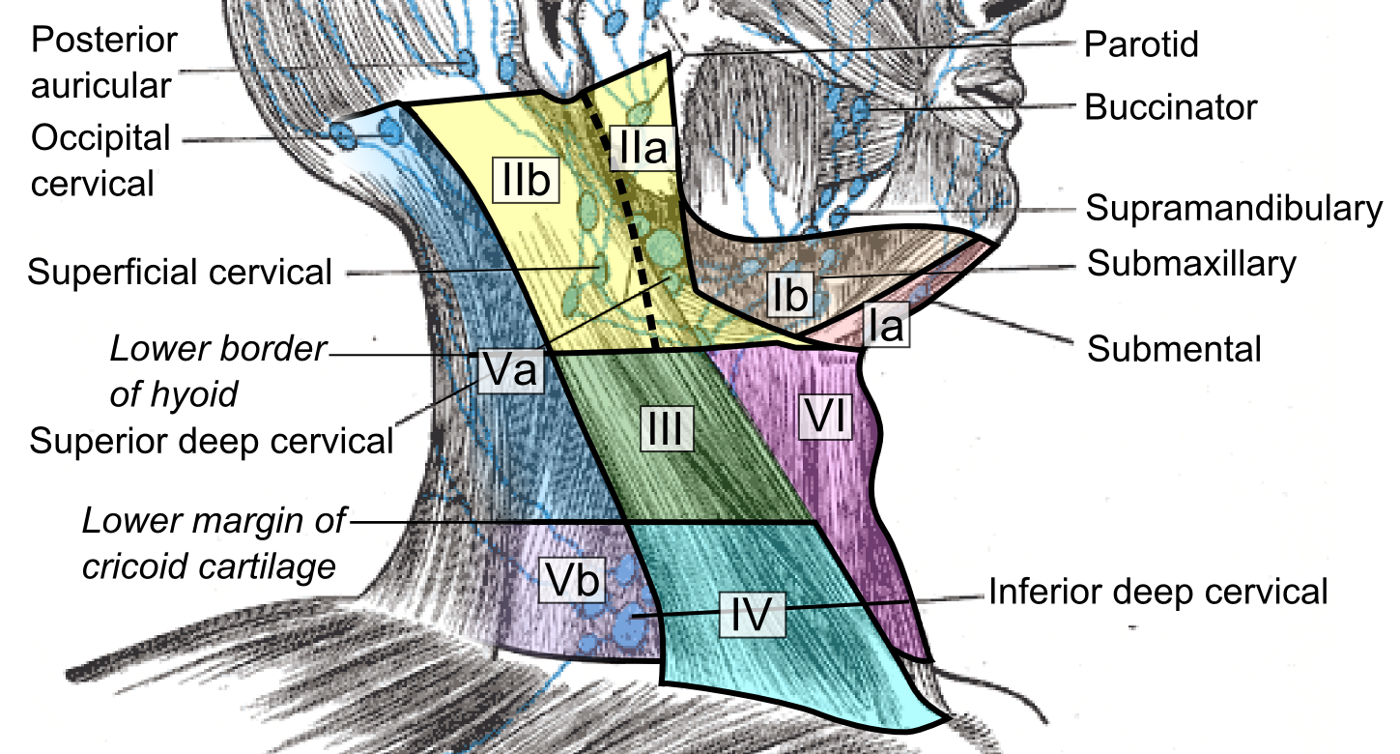
Image - The levels and groups of cervical lymph nodes. Working through them in a set order ensures no group is missed during the examination
SimpleMed original
The supraclavicular nodes deserve special attention. An enlarged left supraclavicular node is known as Virchow’s node, and its presence (Troisier’s sign) is a classic indicator of intra-abdominal malignancy, particularly gastric cancer, because the thoracic duct drains abdominal lymph into the venous system at this point. Enlargement of the right supraclavicular node may suggest malignancy of the lung or oesophagus.
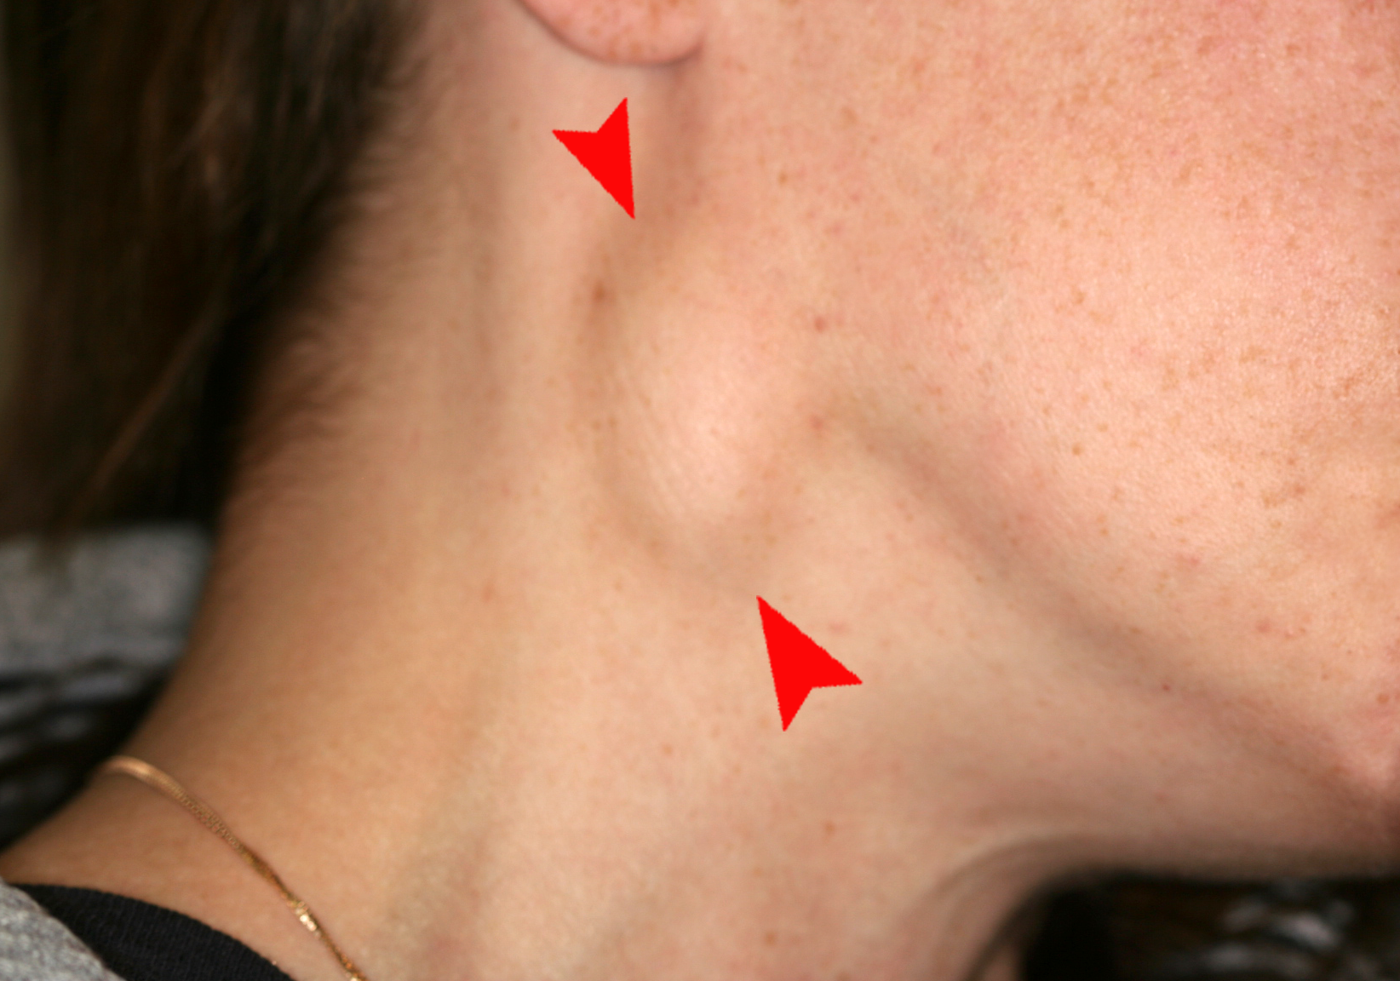
Image - Cervical lymphadenopathy in the right side of the neck (arrows). Enlarged, persistent cervical nodes warrant investigation for infection or malignancy
Creative commons source by Coronation Dental Specialty Group [CC BY-SA 4.0 (https://creativecommons.org/licenses/by-sa/4.0)]
- 235